A boat that is made of wood is adored by its owner for many reasons. Traditional feel of a wooden boat is un matchable and the fact that it can naturally prevent wear and tears for a pretty long time is wonderful too. But at some point, it will start to degrade with being open to several elements. And this can lead to additional depreciation.
One of the major concerns is resisting degradation due to water. Through waterproofing the wood, you can prevent this horrible consequence, however. So today, let’s walk through a simple method of how to waterproof wood for a boat.
Here’s How to Waterproof Wood for a Boat Using a Simple Method.
To get the boat safe from any rot due to long term water exposure, you need to buy a quality sealer. The tighter you’ll be able to seal wood, better protection it will have overall. We will be focusing on sealing a marine plywood boat. This is different from regular plywood since it comes with 10 layers of thickness. Through waterproofing, you will be able to increase its longevity. Keep on Reading…
1. Get Materials.
- A foam brush or paintbrush.
- Clean cloth or fiber.
- A sealant.
- Sandpaper
2. Start with a Good Sanding Session.
Before you focus on waterproofing plywood, give the surface a good sanding. That way the sealant will be able to stick better to surface. You can use a suitable sandpaper for sanding the surface of your boat. The 80-grit sandpaper will work better here. Make sure you go through all the surface area.
After sanding, give the surface a good clean. Use a cloth to simply wipe away any debris on it. you can even use a damp fabric or give it a wash if necessary. So that there’s no stain or dirt to cause a problem when applying the sealant later on. You should also wait until it dries off completely.
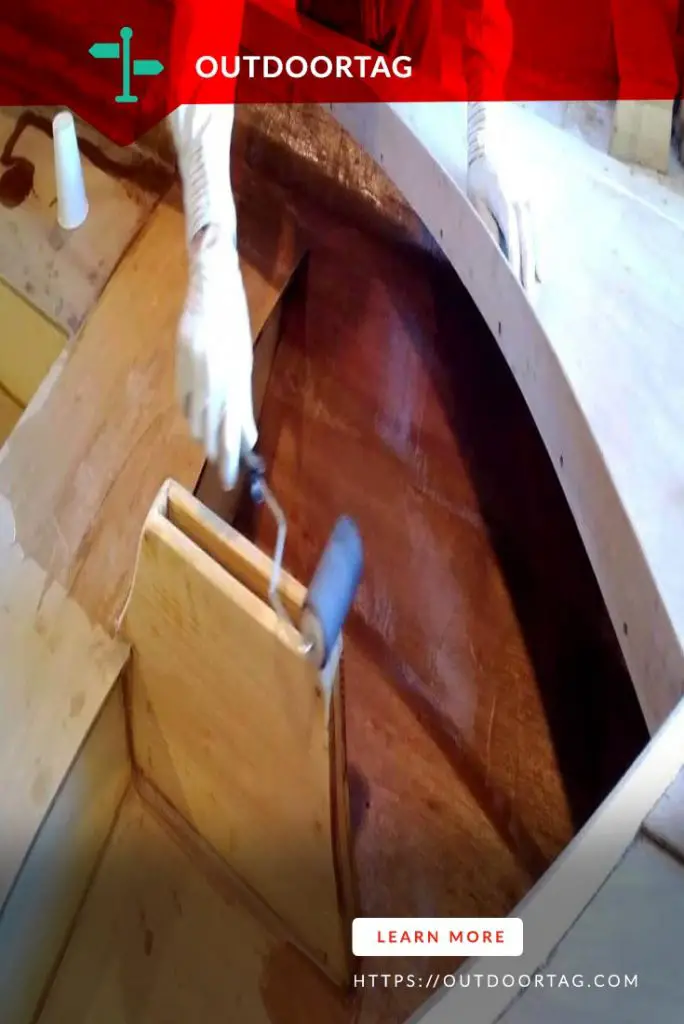
3. Time for The Sealing Process.
Now you should have some high-quality marine wood sealer for this next step. Slowly dip the paintbrush inside sealant solution. Don’t take too much produce at a time. You want to go for a thin coating and gradually build up if necessary. So, start applying in that formula.
Make sure you are paying attention to all parts of your boat. Sometimes the edges and corners get left out. So, you should be extra careful to not miss those areas in particular. Once you get satisfying results with a thorough application, give it some time. You should let the first layer dry completely and this is very important for your next layers to stick nicely.
4. Adding Layers to Expand the Sealing Protection.
Usually, most of the sealants available at market will need a specific amount of time to completely dry off. It’s somewhere between 4 to 10 hours in general cases. As soon as your first layer is wholly dry, you can move ahead and apply a few more.
Make sure you decide the layers of the coating by considering plywood’s total layer. If your plywood has more layers than definitely it needs more sealant for waterproofing.
Also, before applying the next layer, you should give it gentle sand if possible. Between coats, this can be a simple trick to ensure a better application and overall, more result-proof outcome. Since with sanding, you will allow each coat layers to adhere properly to the surface. When applying the sealant, keep in mind about upside-down application. Since that area stays in direct contact with water for the maximum amount of time.
5. Also, Keep in Mind These Tips While Sealing.
When you are applying paint or sealant for waterproofing, make sure to first read the instructions well. There can be specific guidelines that might not fall under the general application formula. Missing out those manufacturer’s provided important instruction can lead to not getting satisfying results. So do make sure you give those guidelines a check before doing anything at all.
Also, you should not go for such applications on a rainy day. You must keep the job for a day that you’ll be free. So that you don’t rush the process since this will lead to improper results. It’s best to keep the chore for a long weekend.
Some people may think applying thick coats can save them time. But the opposite is actually true. A thicker coat will not get applied evenly, first of all. And then also, it’s going to take more time to dry compared to a thin layer.
In some cases, paints and sealants that are moisture cured starts reacting with water vapor. And this makes CO2 gas while curing. The gas will eventually get trapped inside your applied layer. And this will form a bubble later on. Eventually, the bubbles will pop and you’ll be left with pinhole finishes.
When you are applying any kind of sealant or paint, there’s a good chance of fumes messing up your respiratory system. So, make sure you are wearing a proper face mask or respirator to avoid any negative consequences. Try to keep enough ventilation going on if you’re working in a bounded place. You should keep the windows and doors open.
Outdoor Speak: From your boat to your front and rear deck at home, we’ll provide you with tips to make sure your wood floorings will last long — Non Pressure Treated Wood.
Watch This!
Wrap Up
And that was how to waterproof wood for a boat and keep it going solid for a long time. The boat’s wood has to go through a lot due to being in contact with an extremely challenging plus changing environment.
You may have knowingly or unknowingly thrown tools and gears over the decks and surfaces of your boat. And this is definitely causing impacts, abrasion and even damaging the underlying layers of wood. So, don’t make that mistake and give your boat better treatment. No matter what material it’s made from.
The boat usually needs solid maintenance plus caring to stay in a good condition for a long time. And if you don’t want to lose the solidity and performance of your boat, make sure you’re thinking about treating it the right way. Signing Off on That Note!